Innovations That Have Changed Material Handling Equipment
Material handling has evolved with groundbreaking advancements that enhance efficiency, safety, and productivity in industrial operations around the world.


Whether you’re a professional tile handler, a home renovator, or a DIY enthusiast, knowing how to cut porcelain tile is a valuable skill. Cutting porcelain tile is a challenge due to its hard, dense nature, but mastering the right technique is key to achieving a clean, professional finish. Our step-by-step guide below will break down what you need to know about porcelain tiles, the tools you’ll need for the job, and the cutting process from start to finish.
Before cutting porcelain tiles, it’s important to understand what sets them apart. Porcelain tiles are a type of ceramic tile but are finer clay, and manufacturers fire them at higher temperatures. This makes them a denser, less porous tile that is incredibly strong and resistant to stains, water, and wear.
However, the same properties that make porcelain tiles so desirable also make them harder to work with. Their density requires special tools and techniques to ensure clean, precise cuts.
Like with any job, having the right quality tools is integral to success. The tool you choose will depend on the type of cut you need and the scale of your project. There are three primary tools for cutting porcelain tiles.
First, the manual tile cutter is ideal for straight cuts. It applies pressure to score and snaps the tile cleanly. Next, a wet saw is for more intricate cuts, such as curves or corners, and is best for larger projects. Lastly, tile nippers are for small adjustments and irregular shapes, offering precision for tight spaces and detailed work.
Safety is always the priority when working, especially when it comes to dangerous cutting tools and precious materials like tiles that produce fine dust and sharp edges. Always wear safety goggles to protect your eyes, gloves to prevent cuts, and a dust mask if using a dry saw to avoid inhaling particles. Only cut tile in a clean, organized space with good ventilation.
If using a wet saw, keep the area dry to prevent slipping and maintain a firm grip on the tile. Prioritizing safety helps ensure a smooth and accident-free process.
Now, it’s time for our guide to take you step-by-step through the porcelain tile-cutting process. Through each step, patience, diligence, and care are crucial for a safe and effective tile cut.
Before starting, ensure you prepare and organize all the necessary tools and materials. This includes a tile cutter or wet saw, a pencil for marking, a measuring tape, a straightedge, and essential safety gear like goggles and gloves.
At Detroit Diamond Tools, we have everything you need to cut tile, from Sigma tile cutters with lasers to grinding wheels and mounting kits. Prepare your work area and surface to ensure it’s clean, sturdy, and has plenty of light to work with.
Start by determining the exact dimensions you need for the tile to fit perfectly in its location. Use a measuring tape to measure carefully, and double-check your measurements to ensure accuracy. With a pencil, mark the cutting line clearly on the glazed surface of the porcelain tile.
As the adage goes, “measure twice, cut once.” For best results, use a straightedge or ruler to guide your pencil and create a perfectly straight line.
After marking the tile, securely place it on your cutting station. Use a straightedge to align the tile or clamps if needed to hold it firmly in place.
This step ensures stability while cutting, reducing the risk of the tile slipping or moving during the process. A stable tile will allow for more precise cuts and help prevent accidents or damage to the material.
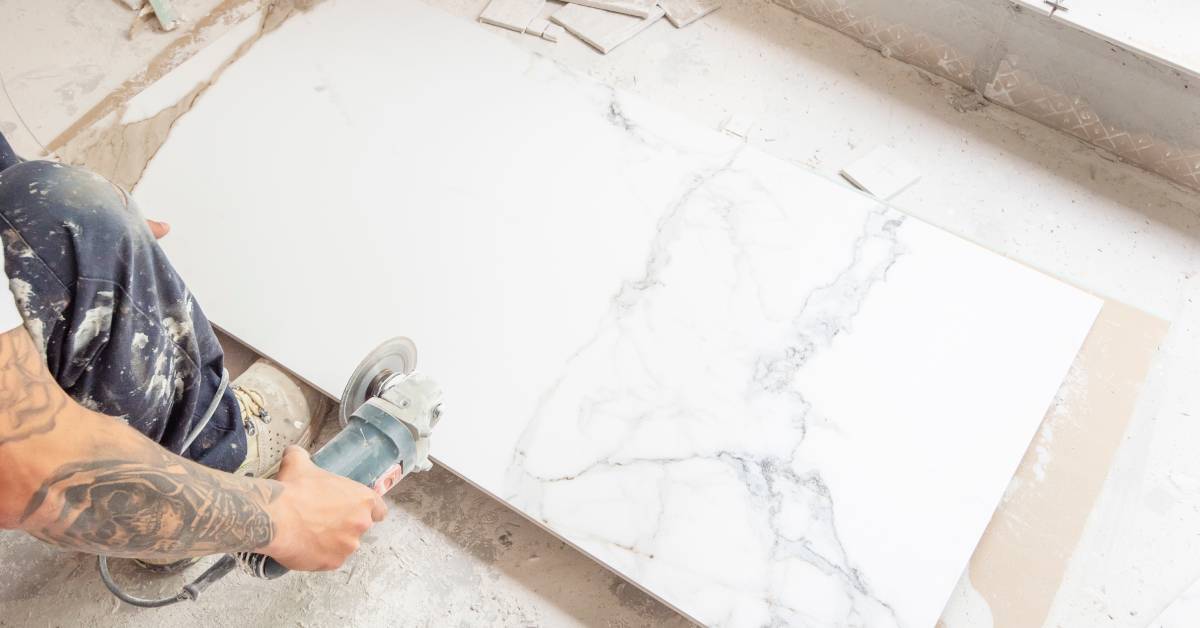
For straight cuts, a manual tile cutter is a simple and effective tool. Align the marked line on the tile with the cutter’s guideline. Apply consistent pressure as you score the surface in one smooth motion.
Scoring weakens the tile along the marked line, making it easier to snap cleanly. After scoring, press the cutter’s handle down firmly but carefully to snap the tile along the line.
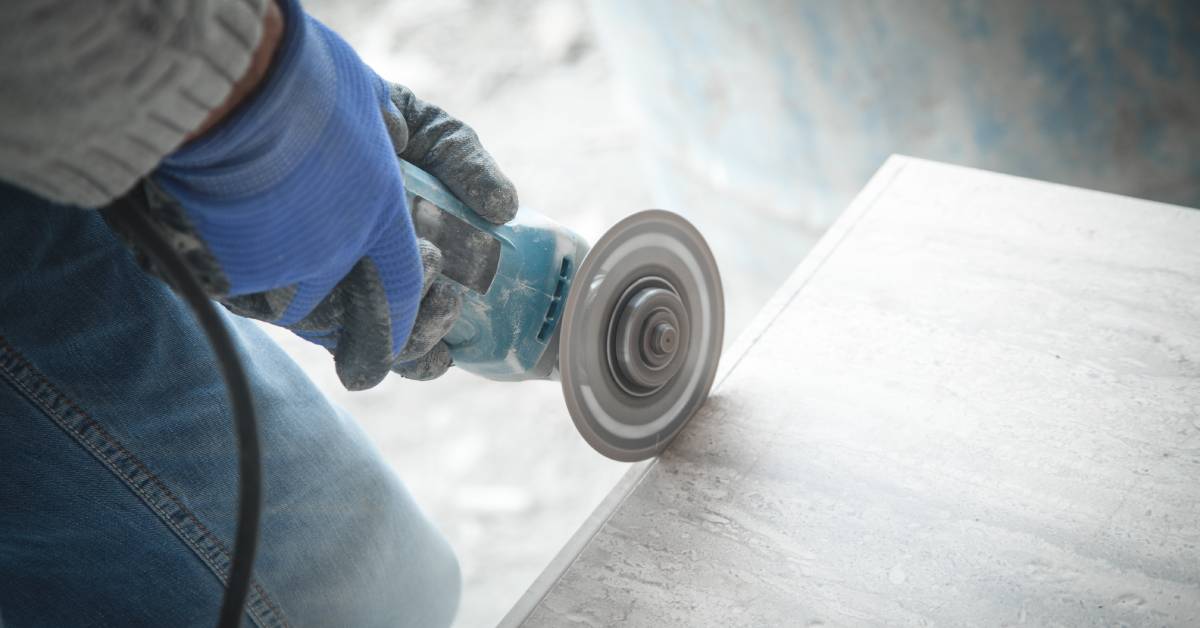
When the project calls for curved cuts or intricate shapes, a wet saw is the better tool. Before starting, check that the water reservoir of the saw is full and functioning properly to keep the blade cool and prevent dust.
Turn on the wet saw, guide the tile slowly and evenly along the saw blade, and follow your markings carefully. Maintain a steady grip and work patiently to achieve clean, accurate cuts. For best results, practice on a spare piece of tile to get comfortable with the wet saw before cutting your main pieces.
After cutting, take a close look at the edges of the tile. Use a rubbing stone, tile file, or sandpaper for porcelain to smooth out any rough or sharp edges left after the cut.
This step ensures the tile fits correctly but also eliminates sharp edges that could pose a hazard during installation or later use. Sand the edges thoroughly, especially for tiles that will be in high-traffic areas or visible locations.
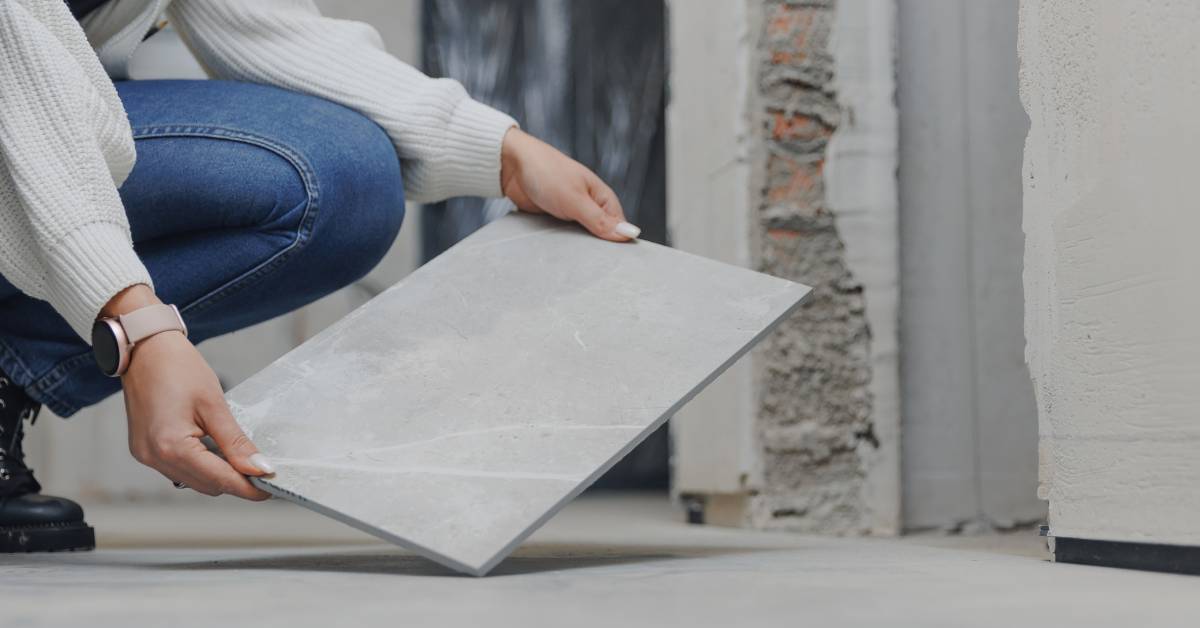
After smoothing the edges, wipe the tile down with a damp cloth to remove any dust or debris from the cutting and sanding process. Place the tile in its intended location and test the fit, making sure that the dimensions and shape are accurate.
If the fit is not perfect, make the necessary adjustments by trimming or sanding further. Testing the fit before final installation ensures that the tile will sit properly and align with the surrounding tiles.
When cutting tiles, there are many mistakes that beginners make you should avoid. Most of these mistakes come from the cutter trying to do too much—relax and be patient while cutting for a precise and smooth cut.
One common mistake when cutting porcelain tiles is applying too much pressure while scoring. This can lead to cracks or uneven cuts. Instead, use just enough force to create a visible score line when using a manual tile cutter.
Rushing while cutting, especially with a wet saw, can cause chipped edges or crooked cuts. Attempting to move too quickly can compromise the quality of your work. Always let the tool work at its ideal speed and apply consistent pressure for a clean cut.
Lastly, don’t ever forget to take safety seriously. Failing to wear protective gear increases the risk of injury and can undermine your ability to work confidently. Always prioritize safety by wearing gloves, goggles, and other necessary equipment before starting any tile-cutting project.
Cutting porcelain tiles doesn’t have to be intimidating. With the right tools, safety measures, and techniques, you can achieve professional results every time.
At Detroit Diamond Tools, we have the cutters and equipment to ensure you cut every porcelain tile with confidence. Browse our inventory to find the tools you need, or contact our staff to speak with a tile expert today!
The best way to cut porcelain tile without chipping it is by using a wet saw with a diamond blade. A wet saw keeps the blade cool and reduces friction, helping produce smooth, clean edges. Ensure the tile is properly secured and apply steady pressure while cutting for the best results.
Yes, a manual tile cutter is great for making straight cuts on porcelain tile, especially when working on smaller projects. However, for thick or harder tiles, or for intricate cuts, a wet saw provides more precision and control.
To cut porcelain tile at home, you’ll need one or more of the following tools depending on the complexity of the job:
Yes, cutting porcelain tile is more challenging than ceramic because porcelain is denser and harder. It requires stronger tools like a wet saw with a diamond blade, while ceramic can often be cut with simpler tools like a snap cutter.
Yes, if you are using a wet saw. Water is essential to cool the blade, reduce dust, and prevent tile chipping. Manual cutters and tile nippers don’t require water but are limited to specific types of cuts.